Bring Your Own Sending Domain
Broadcasts go out from a sending pool — the set of domains and mailboxes SpiderMail paces your mail across. This guide walks you through putting your own domain in that pool: you publish three DNS records, SpiderMail reads them back, and once every one checks out the domain starts sending for you and for nobody else.
It takes about ten minutes of work and then however long your DNS takes to propagate.
Why your own domain
Sending reputation attaches to a domain, and it does not transfer between domains. That cuts both ways, which is the point:
Mail you send builds your domain's reputation, so good sending compounds into better inbox placement for you.
Another customer's cold outreach happens on their domain, so it cannot drag yours down.
A verified domain joins your pool only. There is no shared pool to fall into.
Before you begin
You need three things:
A domain you control the DNS for. A subdomain is the usual choice, such as
mail.example.com, so your main domain's reputation stays separate from bulk sending.Access to that domain's DNS, at your registrar or wherever your zone is hosted. You will add three records.
An API key from your sending provider. SpiderMail supports Mailgun today. The key stays encrypted and is used only to send your mail.
You also need the admin role in your workspace. Anyone with the member role can run the DNS check, but only an admin can complete enrolment.
SpiderMail never asks for, and cannot accept, a credential to your DNS. Verification reads your published records the same way any mail provider does.
Step 1 — Open the pool page
In the dashboard, go to Mail → Pool (/dashboard/mail/pool).
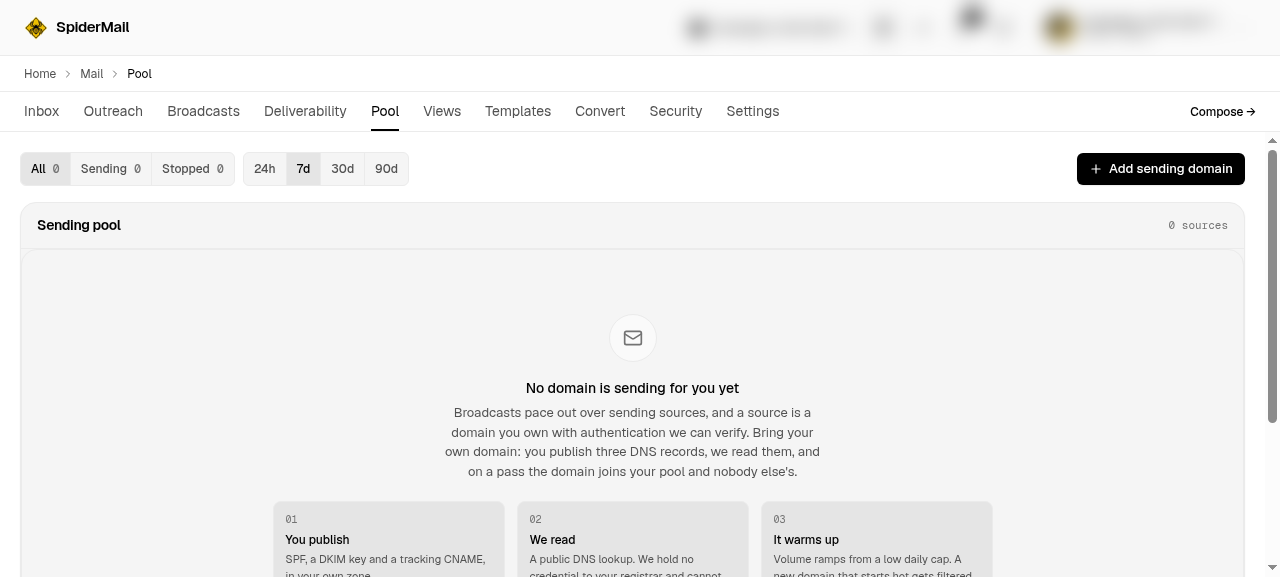
If you have not enrolled a domain yet you will see an empty state reading "No domain is sending for you yet", followed by the three-step summary of what happens next.
Step 2 — Start a domain and copy the records
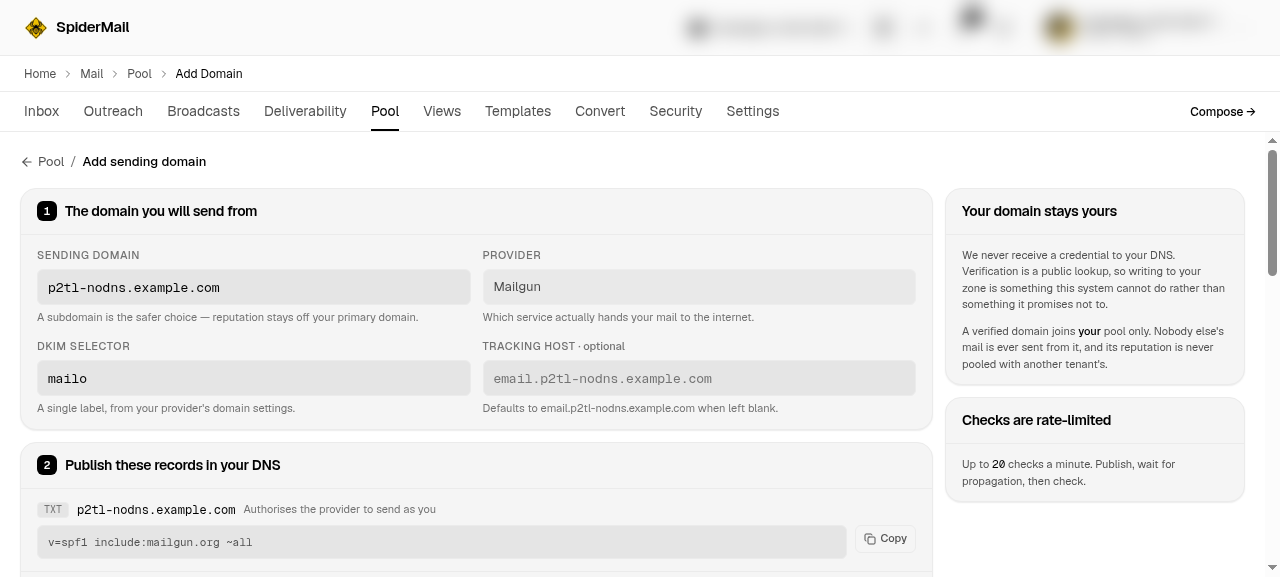
Click Add domain and type the domain you want to send from. The page fills in the exact records for that domain as you type, so you are copying real values rather than a template you have to edit.
You get three records:
::table
Record | Type | What it does
SPF | TXT | authorises your provider to send for the domain
DKIM | TXT | publishes the key that signs your mail so receivers can verify it
Tracking | CNAME | routes click tracking through a host you own
The DKIM record's name includes a selector. The page shows the full name to publish, for example mailo._domainkey.mail.example.com — copy it exactly, selector and all.
The tracking host is optional. Leave it blank and it defaults to email. in front of your sending domain, so the CNAME still points at a host on your own domain. Turn tracking off entirely and you get no click data for this source.
What SpiderMail will not do in either case is route your links through a shared tracking host. That host's reputation would not be yours, and its problems would become yours.
Step 3 — Publish the records in your DNS
Add all three at your DNS provider. Nothing here is SpiderMail-specific — these are ordinary TXT and CNAME records.
DNS changes are not instant. Most providers publish within a few minutes, though some take longer. There is no harm in checking early; the check writes nothing.
Step 4 — Run the check
Back on the add-domain screen, click Check DNS.
Each record gets its own verdict, and each verdict is one of three things:
::table
Result | Meaning | What to do
Passed | the record was read and matches | nothing
Failed | the record was read and does not match | compare the expected value shown against what you published
Could not read | the lookup did not return an answer | usually DNS has not propagated yet; wait and check again
That third state matters. "Could not read" is not the same as "wrong" — it means the answer is unknown. SpiderMail says so rather than guessing, because sending you to fix a record that is already correct wastes your afternoon.
The footer states the rule the page follows: every check has to pass, not merely none of them fail.
You can run the check up to 20 times a minute. Past that you get a wait time and can try again.
Step 5 — Enrol
Once all three records pass, the enrol step opens up. Choose which mailbox this domain sends through, paste your provider API key, and confirm.
Your key is encrypted before it is stored. SpiderMail does not display it again.
The domain now appears in your pool, in a warming state. New domains ramp up gradually rather than sending at full volume on day one, because a domain with no sending history that suddenly sends thousands of messages is the pattern spam filters are built to catch.
Step 6 — Turn it on
A warming source does not send. Enrolling a domain puts it in your pool; it does not arm it. A broadcast queued while every source is still warming is refused with no_sources, and the refusal arrives at the moment you send rather than when you enrolled — so it reads like a problem with the broadcast when it is not.
Promoting the source is what closes that gap:
spideriq send sources promote 42Promotion needs the admin role, because it arms an identity that sends real mail on your domain.
Unlike the rest of this walkthrough, this step has no dashboard control yet — today it is a command-line or agent action. If you drove steps 1 to 5 through the pool page, this is the one place you will need the CLI or your agent.
Two things to expect from the response. First, the source starts at day one of its ramp — normally 8 messages that day, whatever the domain's history. Promotion re-stamps the warm-up start to today deliberately, so a domain that sat enrolled for months does not resume at a volume it has not earned. Size your first send against the effective daily cap the response returns, not the eventual ceiling.
Second, promotion can be refused, and a refusal is an answer rather than an error to try again:
::table
What you see | What it means | What to do
warmup_not_matured | the ramp has not run long enough yet | wait; retrying the same day changes nothing
reputation_input_required | the source has no delivery history to judge yet | it needs real sends before it can be assessed
already active | someone promoted it already | nothing; check the pool
Neither refusal can be waived from your workspace. Overriding the reputation requirement is an operator action on a separate route, on purpose — a safety check that a workspace token could switch off is not much of a safety check.
Watching the domain once it is live
The pool page shows each source with its own numbers: its current cap, how much of that it has used, and its own bounce and complaint rates.
Per-source rates are the reason this page exists. One number for your whole account tells you something is wrong; a number per domain tells you which one.
If a source crosses 0.3% complaints it pauses itself and raises an alert. Mail already queued for it is held, not thrown away, so nothing is lost while you work out what happened.
One caveat worth knowing: if a rate reads as unavailable rather than as a number, that means the calculation did not run, not that everything is fine. A workspace with no mailboxes yet will read that way.
Doing this from an agent or the command line
Everything above is available without the dashboard.
From an agent. Install the SpiderMail skill and ask in plain language:
Check whether mail.example.com is ready to send, and tell me which DNS records are missing.
The skill is @spideriq/mail-skills, available on the OPVS Marketplace and mirrored on GitHub. It teaches the agent the whole send tier, including the traps — most importantly that a queued broadcast is not a sent one. See Overview for installing it in your client.
From the command line, with the CLI:
spideriq send domain verify mail.example.com
spideriq send domain add mail.example.com --mailbox-id 42
spideriq send sources promote 42
Pass the provider key through the SPIDERIQ_SEND_PROVIDER_KEY environment variable rather than as an argument, so it stays out of your shell history. Add --yes for scripts.
Read the pool and its reputation with spideriq send sources list and spideriq send reputation summary --range 7d.
Troubleshooting
The check says "could not read" for every record. The domain's DNS is not answering. Confirm the zone resolves at all before looking at individual records.
SPF passes but DKIM does not. The selector is usually the cause. The name must match exactly, including the selector portion, so mailo._domainkey.mail.example.com is not interchangeable with default._domainkey.mail.example.com.
Everything passes but enrolment returns a conflict. That mailbox already acts as a sending source for a different workspace. SpiderMail will not move it, because its whole sending history belongs to the other workspace and handing that record over would be misleading. Pick a different mailbox.
Enrolment is refused with a permissions error. Running the check needs the member role; completing enrolment needs admin, and so does promoting a source.
The broadcast is refused with no_sources, but the pool is not empty. Every source in it is still warming, and warming sources are never claimed. This is step 6 — promote one, then queue the broadcast again. Nothing about the broadcast needs changing.
No click data after enrolling. If you skipped the tracking CNAME, click tracking is off for that domain by design. Publish the CNAME and set the tracking domain to turn it on.
What next
Send tier API reference — every route, parameter and error
Sending, Replying and Forwarding — the per-message send path
Agent Security — what SpiderMail checks before an agent reads a message